How to Grow Mushrooms in Buckets
Mushrooms are a delicious and nutritious food that can be grown at home with some simple equipment and materials. One of the easiest ways to grow mushrooms is in buckets, which provide a suitable environment for the fungi to thrive. In this blog post, we will show you how to grow mushrooms in buckets using oyster mushrooms as an example. Oyster mushrooms are one of the most popular and versatile mushrooms, and they can grow on a variety of substrates, such as straw, wood chips, sawdust, or sugarcane mulch.
What You Need to Grow Mushrooms in Buckets
- A 5-gallon plastic bucket with a lid. You can buy a new bucket or use an old one, but make sure it is clean and free of any harmful chemicals. You will also need to drill holes all around the bucket, about 4-6 inches apart, using a 1/4 inch or 1/2 inch drill bit. These holes will allow air exchange and mushroom growth.
- Oyster mushroom spawn. This is the living material that contains the mushroom mycelium, which is the root-like network of fungal cells. You can buy oyster mushroom spawn online or from a local mushroom supplier. You will need about 2.5 to 5 pounds of spawn for each 5-gallon bucket, depending on how fast you want the mushrooms to colonize the substrate.
- Substrate. This is the material that the mushrooms will grow on and feed from. You can use hardwood chips, straw, sawdust, or sugarcane mulch as your substrate. You will need enough substrate to fill your bucket about 3/4 full. You will also need to pasteurize your substrate before adding the spawn, which means heating it up to kill any unwanted organisms that could compete with the mushrooms. There are different ways to pasteurize your substrate, such as using hot water, hydrated lime, or steam.
- A large plastic tote or container. This is where you will soak your substrate in hot water or hydrated lime solution for pasteurization. The container should be big enough to fit your substrate and have a lid or cover.
- A spray bottle for water. This is for misting your mushrooms during fruiting to keep them moist and prevent drying out.
- A clear plastic bag. This is for covering your bucket during colonization to maintain high humidity and prevent contamination.
How to Grow Mushrooms in Buckets - Step by Step Guide
Step 1: Prepare Your Bucket
Once you have all your supplies, the first step is to prepare your bucket. Drill holes all around the bucket using a 1/4 inch or 1/2 inch drill bit, leaving about 4-6 inches of space between each hole. These holes will allow air exchange and mushroom growth. Wash your bucket and lid with warm soapy water and rinse well.
Step 2: Pasteurize Your Substrate
The next step is to pasteurize your substrate to kill any unwanted organisms that could compete with the mushrooms. There are different ways to pasteurize your substrate, but we will use the hot water method as an example.
Fill a large plastic tote or container with water and bring it to a boil on a stove or burner. Add your substrate to the boiling water and stir well. Cover the container with a lid or cover and let it soak for about an hour. Alternatively, you can use hydrated lime solution instead of water for pasteurization. To make hydrated lime solution, mix one cup of hydrated lime with five gallons of water in a large container. Add your substrate to the solution and stir well. Cover the container with a lid or cover and let it soak for about 16 hours.
Step 3: Cool and Drain Your Substrate
After pasteurizing your substrate, you need to let it cool down and drain excess water before adding the spawn. You can either let it cool overnight or use cold water to speed up the process. To drain your substrate, you can use a colander, a mesh bag, or a pillowcase. Squeeze out as much water as possible from your substrate until it is moist but not dripping wet.
Step 4
Now that your substrate is ready, you can add your oyster mushroom spawn to it. Break up your spawn into small pieces and mix it well with your substrate in a large bowl or container. You want to distribute the spawn evenly throughout the substrate so that every part of it gets colonized by the mushroom mycelium.
Step 5: Fill Your Bucket With Your Substrate-Spawn Mixture
Take your prepared bucket and fill it with your substrate-spawn mixture, packing it firmly but not too tightly. Leave about 2 inches of space at the top of the bucket. Put the lid on your bucket and cover it with a clear plastic bag. Poke some small holes in the bag for ventilation. Label your bucket with the date and the type of mushroom you are growing.
Step 6
Place your bucket in a dark and warm place, such as a closet, a basement, or a garage. The ideal temperature for oyster mushroom colonization is between 65°F and 75°F. Keep your bucket in this environment for about 2 to 4 weeks, or until you see white mycelium covering the entire surface of the substrate and growing out of the holes in the bucket. This means that your bucket is fully colonized and ready to fruit.
Step 7: Fruit Your Bucket
To fruit your bucket, you need to expose it to light, fresh air, and humidity. Move your bucket to a bright and airy place, such as a windowsill, a balcony, or a greenhouse. The ideal temperature for oyster mushroom fruiting is between 55°F and 70°F. Remove the plastic bag and the lid from your bucket and mist your mushrooms daily with water to keep them moist. You should see small mushroom pins forming within a few days, which will grow into full-sized mushrooms within a week or two.
Step 8: Harvest and Enjoy Your Mushrooms
When your mushrooms are ready to harvest, you can simply twist them off from the substrate or cut them with a sharp knife. You can harvest your mushrooms when they are young and tender, or wait until they are fully mature and have opened their caps. It's up to you and your preference. You can store your fresh mushrooms in a paper bag in the refrigerator for up to a week, or dry them for longer storage.
You can also get a second flush of mushrooms from your bucket by soaking it in cold water for about 12 hours and repeating the fruiting process. You may get smaller yields from the second flush, but it's still worth trying.
Mushrooms Boost Health for Women
Hey ladies! Are you ready to tap into the amazing world of functional mushrooms? These natural powerhouses have been buzzing in the health and wellness community, and for a good reason! Today, we're going to spill the beans on how functional mushrooms can target the specific needs of women over 50, helping you maintain a vibrant and energetic lifestyle. So, buckle up and get ready to discover your secret health boost!
- Recharge Your Energy with Cordyceps: As we age, it's common to experience a decline in energy levels. But fret not! Cordyceps, a unique functional mushroom, is here to save the day. Known for its energizing properties, cordyceps helps combat fatigue and supports physical performance. Whether you're hitting the gym or simply want an energy pick-me-up, this mushroom is your new best friend!
- Boost Your Brain Health with Lion's Mane: Do you ever find yourself misplacing your keys or struggling to recall a word? Lion's Mane, another fantastic functional mushroom, has got your back. This mushroom is known to support cognitive function, memory, and overall brain health. Say hello to mental clarity and bid farewell to those pesky "senior moments"!
- Strengthen Your Immune System with Reishi: As we age, maintaining a robust immune system becomes even more crucial. Enter Reishi, the "queen" of functional mushrooms. With its powerful immune-boosting properties, Reishi can help fortify your body's defense system, keeping those unwanted bugs at bay. Enjoy your golden years with vitality and vigor!
- Balance Hormones with Chaga: Ladies, we all know that hormonal imbalances can wreak havoc on our well-being. But fear not, Chaga is here to lend a helping hand. This functional mushroom is rich in antioxidants and may assist in balancing hormones, reducing inflammation, and promoting overall hormonal harmony. It's time to embrace your age gracefully!
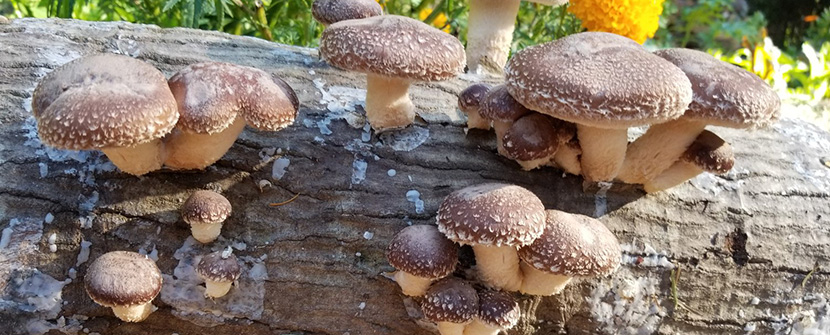
- Nourish Your Bones with Shiitake: Bone health becomes a top priority as we age, and Shiitake mushrooms are here to provide the necessary support. Packed with essential nutrients like vitamin D, calcium, and magnesium, Shiitake mushrooms can contribute to bone strength and help reduce the risk of osteoporosis. Stand tall, ladies!
- Elevate Your Mood with Maitake: Maintaining a positive mindset is crucial for overall well-being. Maitake mushrooms, known for their adaptogenic properties, may help support a healthy stress response and promote emotional well-being. Let the good vibes flow!
Now that you know the superpowers of these functional mushrooms, you might be wondering how to incorporate them into your daily routine. Fear not, for there are various ways to enjoy these marvelous fungi. You can find them as supplements, powders, teas, or even incorporate them into delicious recipes. Get creative and explore the flavors and benefits these mushrooms have to offer!
However, it's important to remember that functional mushrooms are not a magic cure-all. They are best enjoyed as part of a balanced and healthy lifestyle, including regular exercise, a nutrient-rich diet, and good sleep hygiene.
So, ladies over 50, it's time to embrace the power of functional mushrooms and give yourself the health boost you deserve. Recharge, energize, and thrive as you continue to shine brightly in this beautiful chapter of life. Let the mushrooms work their magic and unlock the best version of you!
Disclaimer: Before incorporating functional mushrooms into your routine, it's always a good idea to consult with a healthcare professional, especially if you have underlying health conditions or are taking medications.
Note: The information provided in this blog is for informational purposes only and should not be considered as medical advice.